Tuesday, May 10, 2011

Chinese Chicken with Broccoli (Official Meal #4)

Ever since I stumbled upon this recipe, my parents seemed excited to try it.  I was supposed to cook this meal last week, but due to an overflow of recipes and such a small amount of time, I wasn't able to squeeze this into the dinner rotation.  This week, I made sure that this recipe was on the top of my "to - cook" list.


Ingredients
- 1 tbsp. peanut oil, divided
- 1½ tsp. sesame oil
- 2 boneless, skinless chicken breasts, cut into bite-sized pieces
- 4 cloves garlic, finely minced
- 1 tsp. grated fresh ginger
- ¼-½ tsp. red pepper flakes
- 4 cups broccoli florets
- 6 tbsp. chicken broth, divided
- 2 tbsp. oyster sauce
- 1 tbsp. hoisin sauce
- 4 tbsp. soy sauce
- 1½ tsp. cornstarch
- 3 scallions, chopped
- Sesame seeds, for garnish (optional)


1. Heat about half of the peanut oil and the sesame oil in a large skillet over medium-high heat.  Add the chicken pieces to the pan and sauté until golden brown and cooked through.


2. Transfer to a bowl with a slotted spoon and cover with foil to keep warm.  Add the remaining oil to the pan.  Add the garlic and ginger and sauté until fragrant, about 30 seconds.  


3. Add the red pepper flakes and broccoli florets to the pan.


4. Pour in about half of the chicken broth – it should steam and boil quickly.  Allow the broccoli to cook until crisp-tender and the broth has mostly evaporated. Add the oyster sauce and hoisin sauce to the pan.
  

5.  In a small bowl, whisk together the soy sauce and cornstarch, and add to the pan. 
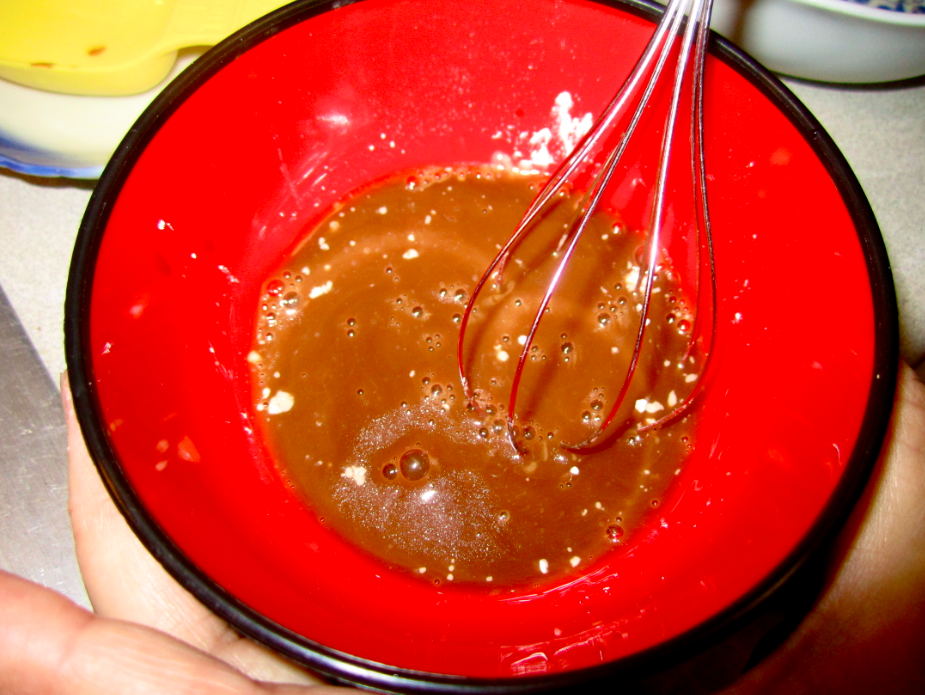


6. Stir in the remaining chicken broth.  Return the chicken pieces to the pan.  Cook, stirring frequently, until the sauce has thickened, about 2-3 minutes.  


Remove from the heat and stir in the scallions.  Serve over rice and garnish with sesame seeds, if desired.


My parents and I were very pleased with the final product.  They both complimented the succulent and tasteful flavors that filled their mouths whenever they took a new bite.  Everything was cooked perfectly - the rice, the broccoli, the chicken, even the sauce.  While cooking, I was hesitant when adding in the red pepper flakes.  The recipe called for 1/4 - 1/2 tsp of flakes, but since I hadn't attempted this recipe before, I had no idea to how spicy the dish would turn out.  Ultimately, I decided to play it on the safe side and add 1/4 tsp of red pepper flakes.
Thankfully, amount of red pepper was perfect.  You could taste a hint of the spiciness and zest that the red pepper added to the dish.  It wasn't too weak, yet it didn't overpower the overall balance of flavor of the dish.

A few suggestions that I would take into consideration would be...
1) The addition of tofu - Chicken, tofu, and broccoli... how could you go wrong?

2) More chicken broth and a little less hoisin sauce and oyster sauce -
The first few bites of chicken and broccoli were heavenly.  My mouth filled with delectable and delicious flavors that I had never thought I had the ability to create.  As the amount of food on our plates lessened, we had cooked up another suggestion.  We would remember to use more chicken broth and less hoisin and oyster sauce next time.  As the dish became colder after being removed from the heat, the hoisin and oyster sauce thickened out, causing the flavor to become more pungent than desired.  The chicken broth would "thin out" the sauce while lightly diluting it.

3) Toss the sesame seeds into pan mixture instead of sprinkling on after -
Considering my parents and I don't use sesame seeds, we were pleasantly surprised with the texture and taste that the sesame seeds added when they were sprinkled on the final product.  The next time we make this recipe, we will be sure to added in the sesame seeds into the mixture instead of on top of it.  This way, the texture would be consistent throughout the whole dish, instead of just on top.  

While cooking this dish, I have improved my ability to taste.  I know, it may sound silly, but I feel as if that is quite possible.  By improving my taste, I have improved my ability to pick out what each spice/sauce/oil does to the dish and what I can change in order to improve it.  For example, while cooking, I got a sense of how much oil and herbs I added in order to end up with my resulting dish.  By become accustomed to this practice, I could master each recipe I attempt within a few tries.  Learning how to "taste" and adjust can help make bland and uninteresting ingredients turn into decadent and appetizing meals.

Monday, May 9, 2011

The May 8 - May 14 Grocery List

 Dinner Ingredients
- 12, 6 flour tortillas (~100 calories each)
- 24 small square wonton wrappers (the kind near the tofu in the refrigerated section of the produce dept)
- 6 egg roll wrappers (each 7 inches squared)
- 2 cups cooked brown rice
- 1 tbsp. peanut oil, divided
- 1½ tsp. sesame oil
- 2 boneless, skinless chicken breasts, cut into bite-sized pieces
- 8 oz raw chicken breast
- 12 oz raw ground turkey - 4 cloves garlic, finely minced
- 1 tsp. grated fresh ginger
- 2 cloves garlic, minced
- 4 cups broccoli florets
- 1 cup chopped onion
- ½ cup chopped mushrooms
- 3 scallions, chopped
- 1, 15 oz can black beans, drained and rinsed
- 1, 16 oz bag frozen bell pepper strips, cooked and drained
- 1 cup baby spinach leaves
- 6 tbsp. chicken broth, divided
- 14.5 oz can crushed tomatoes, or tomato sauce
- 6 tbsp. chicken broth, divided
- 1 cup marinara sauce, plus more for serving 
- 2  1/4 cups medium salsa, divided - 2 tbsp. oyster sauce
- 1 tbsp. hoisin sauce
- 4 tbsp. soy sauce
- 2 cups mozzarella cheese
- 1/4 cup parmesan cheese
- 1 1/2 cups shredded Mexican blend cheese
- 1 ½ cups part skim ricotta cheese
- 1½ tsp. cornstarch
- ¼-½ tsp. red pepper flakes
- 3 tsp dried oregano, divided
- ½ tsp dried basil
- ¼ tsp salt, divided
- ¼ tsp pepper
- 1 packet taco seasoning
- Sesame seeds, for garnish (optional)

 Dessert Ingredients
- 2 cups 2% milk
- 1 tablespoon (.5 oz) active dry yeast
- 1 1/3 cup sugar
- 2 teaspoons salt
- 6 ½ cups all-purpose flour, divided
- 2 eggs
- ¼ cup unsalted butter, room temperature
- ½ cup unsalted butter, melted
- 1 cup brown sugar

- 3 tablespoons cinnamon
- 1 cup loosely chopped walnuts, toasted
- 2 cups finely chopped tart apples
- 1 cup powdered sugar
- 2 tablespoons + 1 teaspoon apple cider

The past two Sundays that I spent shopping for ingredients have been the most tiring Sundays I've had in a while.  It might not seem like it, but grocery shopping for a humongous list of ingredients can really suck the energy right out of you.  Today, between the hours of 11 a.m. - 4 p.m., my parents and I visited the Farmer's Market in Manoa, Safeway, Walmart, Subway, Marukai, Costco, and Don Quijote.  Just the act of driving there, getting out of the car, embarking on a mini scavenger hunt to which the list of things to find didn't seem to end, getting back into the car, and driving to the next market was very tiresome.  It makes me appreciate how much work my parents have to go through in order to cook dinner throughout the week.  

Friday, May 6, 2011

Castagnola's Chicken Linguine (Official Meal #3)

When digging through some of mom's old cookbooks for a few more ideas for recipes, my mom handed me a green hardcover book with an shirtless italian man standing on a Hawaii beach as the cover.  I looked at the title of the book.  It was called, Cooking Italian in Hawaii, by George Sabato "Cass" Castagnola.  Honestly, I had no idea what kinds of strange and peculiar recipes I was about to find in a book with such an odd cover, but as I flipped through the pages, despite the lack of pictures (which I regularly gravitate towards to when choosing recipes),  I realized that some of these dishes actually sounded good... delicious actually.  I silently picked out the Chicken Linguine recipe and headed back to my room to do more research on it.  As I did this, my mom came in and told me the book's history.  She told me how her and dad used to constantly go to a restaurant in Manoa called, Castagnola's, and how they used to always order the Chicken Linguine.  Seeing how the decision to make Chicken Linguine was unanimous, I made a list of the semi-familiar ingredients.
Throughout the process of gathering all of the ingredients, my parents seemed a little too excited to make the Chicken Linguine.  Taking into account the fact that Castagnola's shut down 10-15 years ago, I guess I would be too if I were them.

For this dish, I am not allowed to give out the recipe of this special Castagnola's delicacy.  According to the book, I am prohibited to reproduce any part of the book by any "electronic or mechanical means".  In other words, no proportions or instructions will be given out.  The only information I will release are the ingredients and pictures of my dish.


Ingredients: 
- Fresh chicken
- Carrot
- Linguine
- Green bell pepper
- Red bell pepper
- Zucchini squash
- Sliced mushrooms
- Kosher salt
- Freshly ground black papper
- Dried basil
- Romano cheese
- Garlic Flavored Extra Virgin Olive Oil


(I substituted the Romano cheese for the Parmesan cheese used in the previous dish.  I also made my own Garlic Flavored Extra Virgin Olive Oil by adding small, minced garlic bits into extra virgin olive oil.)


While learning how to make this dish, I learned how to julienne vegetables (well, at least I thought I did).  My mom told me that I should cut diagonally and at an angle.  Being lazy, I told her that I checked on the internet and that she was doing it right.  What I said was half true.  I checked on the internet of pictures of julienned vegetables, and I thought I saw the vegetables in the shape of how she was cutting them... but I guess I was wrong.  A video on correct way of how to julienne vegetables is on the right column.                                                                                                      -------------------------------------->
In order to julienne vegetables, you have to cut them into long, thin strips, other known as matchsticks.  Either way, the chicken linguine came out very pretty, so it's all good.

Another skill I learned how to do it cut the raw chicken.  As a kid, I would always peer out from the side of the hallway to secretly watch my parents cut and cook raw meat.  I would always stifle when I saw their fingers work their way around the soft, slimy, pink, and sometimes red meat.  The images of peaking out from behind the corner rushed back to me as I my mom showed me how to cut slivers of chicken off.  Now, I was the one that was slicing through the slippery and mucky body of a chicken.  I felt a tiny sense of maturity as I cut through the meat, slice by slice.  By the end of cutting the chicken, I learned a few things.
First of all, I was lucky that I had bought the chicken I needed from Times.  They had already cut off most of the excess skin and fat, which left me with less work to do!
Second, I was able to cut the chicken however I wanted to.  My mom and I decided to cut them into bite size pieces.  Then, they would be more appetizing and the linguine would be easier to eat.

The final dish turned out very delicious.  My parents seemed to really like it, especially since we nearly finished the entire pan.  Even though the dish was delectable, there is always room for improvement.  A few things to take into account the next time I make this recipe would be:

1. Season the chicken before cooking- A few things I could use would be salt and pepper.  By doing this,  the chicken wouldn't have to rely on the garlic-flavored extra virgin olive oil for its flavor.

2. There should be more garlic added in the extra virgin olive oil.  Instead of mincing 1 garlic clove, my dad suggested that I mince 3.

3. I should add more salt, pepper, and basil when sauteing the chicken linguine mixture.  This would give it more taste.

4. The linguine noodles were cooked perfectly.  We followed the box instructions and cooked the noodles in boiling water for 9 minutes, turned the heat off, and let it sit in the pot for one minute).

5.  The next time we make this dish, we will be sure to buy a baguette from St. Germain's.  Plain, french bread would perfectly compliment the zesty flavors from the chicken linguine.


By the time dinner was over, the chicken linguine had almost disappeared completely from the pan.  We had a few scoops left, which we saved in one of our glass containers for leftovers.  Altogether, the ingredients cost about $15.00 as opposed to $10 we'd have to pay per person if we had all ordered the Chicken Linguine at Castagnola's.  In total, we had replicated a quality meal for 50% of the cost.  From this, I can conclude that learning how to cook reduces the costs of living.  Food occupies a large portion of an average person's budge.  By cooking at home, you spend less money on fancy and expensive restaurants, therefore increasing your overall budget.

Thursday, May 5, 2011

Chicken Pitas with Sun-Dried Tomato Vinaigrette (Official Meal #2)

When I came across the idea of cooking Chicken Pitas, I became a little too excited, considering I love tortilla-like breads.  I immediately engaged in the idea of bringing this recipe to life.  But as soon as I began looking for ingredients, I ran into a few problems.
When I began my search, I realized that I have never used a majority of the ingredients before.  I wasn't familiar with balsami vinegar, basil, and asiago cheese.  The two ingredients I have never heard of were the sun-dried tomato oil and the drained oil-packed sun-dried tomatoes.  This was unfortunate considering the two ingredients I have never heard of, nor knew how to get, were the ingredients that seemed the most important (other than the chicken and pitas).  The recipe was called, "Chicken Pitas with Sun-Dried Tomato Vinaigrette, which probably meant that the sun-dried tomato oil and oil-packed sun-dried tomatoes determined a considerable amount of flavor to the dish.  After going from store to store, my parents and I finally gave up and decided to omit these two unique ingredients.

I admit to wandering off track and disregarding the recipe a number of times.  The con about me cooking is that I'm a really picky eater (at times), and this factor might've intervened when attempting to cook this recipe.  
First off, I didn't add as much balsamic vinegar as needed.  Instead of 2 tbsp, I added 1 1/2, which was a mistake (the dish ended up a bit dry).  I omitted the sun-dried tomato oil and drained oil-packed sun-dried tomatoes.  Since I started off with the wrong amount of vinegar, I tried to adjust the rest of the measurements in order to comply with the first inaccurate measurement.  I ended up adding 1/4 tsp freshly ground black pepper, 1 minced garlic clove, around 2 cups of shredded cooked chicken breast, 3/4 cup chopped tomato, 1/4 cup grated Parmesan cheese (which I substituted Asiago cheese with), and 1/4 cup thinly sliced fresh basil.  
My end result ended up being dry, because I decided to wander off track.  Because of my strong dislike for smelly cheese, such as Parmesan cheese, I ended up adding half the amount I was supposed to.  At the end, my mom had to add a little canola oil to moisten the mixture.  
I ended up trying the recipe out again.  Only this time, I completely followed the recipe.  The second time around, the product had more flavor, and the chicken was more moist.  


Ingredients:
- 2 tbsp balsamic vinegar
- 1 1/2 tbsp sun-dried tomato oil
- 1 tbsp chopped drained oil-packed sun-dried tomatoes
- 1/2 tsp freshly ground black pepper
- 1 garlic clove, minced
- 4 cups shredded cooked chicken breast (about 3/4 pound)
- 1 cup chopped tomato (about 1 medium)
- 1/2 cup (2 ounces) grated Asiago cheese
- 1/4 cup thinly sliced fresh basil
- 6 (6 - inch) pitas, cut in half
- 3 cups mixed baby greens

This recipe is fairly simple.

1) Mix balsamic vinegar, sun dried tomato oil, sun dried tomatoes, pepper, and garlic in a large bowl.


 2. Stir in the designated amount of chicken, tomato, cheese, and basil.


3. Cut pitas in half and line each pita half with 1/4 cup baby greens.


4.  Divide chicken mixture evenly among pita halves.


The first step for me was not mixing the different oils and spices in the bowl.  My first step was shredding chicken - something I have never done before.

How to Shred Chicken (For those of you who are as novice as a cook as I am):
Stovetop method:
Bring a large pot of water to boil on the stove.  Once it starts boiling, place boneless skinless chicken breasts in the pot of boiling water.  No need to add olive oil or seasoning.  You may pound the chicken first of you wish.  Boil until chicken is fully cooked (about 20 minutes).  Make sure there is no pink.
*Do not overcook or it will be a rubbery texture.

Shredding Method:
Let chicken cool for about 5-10 minutes.  Place chicken on a plate and hold chicken breast with one fork.  Use a second fork or use your fingers to pull the chicken and shred into small pieces.
If you are not cooking it immediately, you must refrigerate it to prevent spoilage.

Or... you could do it like me and just buy rotisserie chicken from Costco or Sam's Club, cut it up into small pieces, and use fork and fingers to shred into small pieces. :)


How to Mince Garlic Cloves:
1. Select a bulb of fresh garlic whose cloves are held tightly together and are not discolored.
2. Separate cloves quickly by placing garlic bulb root-side down on cutting board and press and down firmly with the heel of your hand until separate.
3.  To peel cloves, arrange on cutting board and press on them firmly with heavy object, such as the flat side of a chef's knife.
4. Cut away woody end of garlic clove where it was attached to the bulb.
5. Discard skins and clean cutting board before mincing.
6. Chop garlic roughly.  Use same theory as cutting an onion: Make a series of horizontal cuts on the clove (separating it into thin slices), then a series of vertical cuts (Separating it into thin sticks).  Then dice sticks
7. Mince chopped garlic by chopping it in rocking motion:  Keep tip of the knife on the cutting board and move handle up and down.
8.  Stop every few strokes and use blade of knife to draw garlic pieces back into neat pile before continuing.  Scrape off garlic that has been stuck to the side of the knife blade, too.


How to cut basil:
1.  Rinse off leaves and ring out until damp.
2.  Cut basil leaves until appropriate lengths.


I decided to make these chicken pitas because 1) I love any type of bread (including pitas).  2) I love all types of chicken (including shredded). 3) I wanted to work with unfamiliar types of ingredients, such as balsamic vinegar, parmesan cheese (my substitute for asiago cheese), basil, and pitas.

1) I learned how to shred chicken (not the biggest accomplishment ever, but still a good start!)

2) I learned how to mince different ingredients, such as a garlic clove (I know all of these sound pretty basic, but we all have to start somewhere, right?)

3) I learned how to cut basil.


Overall, my parents and I really enjoyed this dish.  But at the end, we have concluded that Chicken Pitas is more of a lunch instead of a dinner.  Nonetheless, we don't regret trying it out, even though the ingredients were a bit difficult to get.

Monday, May 2, 2011

Hamburger Steak with Gravy (Official Meal #1)

The Hamburger Steak I made is a homemade recipe that my dad uses very often.  Since it's homemade, it doesn't really have a recipe.  My dad usually just adds the amount of salt and pepper he thinks is appropriate and cooks the hamburger as long as he sees fit.  While teaching me how to cook, we had to keep track of the measurements for each ingredient.

Serving size: App. 7 med-sized patties

Ingredients:
- 1 lb hamburger (90/10 sirloin)
- 1/2 round onion
- 1/4 cup green onions chopped
- 1 1/2 eggs
- 1/2 tsp salt
- 1/2 tsp pepper
- 5 tbsp oil

Gravy:
- 1 can of Campbell's Beef Gravy (Yep, we're going to be lazy with the gravy)

First, you dump the hamburger in a bowl (in this case, my dad and I used a pyrex glass container).


Second, dice 1/2 of an onion.  In order to do this, first, chop of the edges of the whole onion.  Then, tear off the outer skin.  After, you cut the onion in half and cut in the opposite direction of the onion layers.  Dice each slice.  *Tip: Make sure fingers are bent it when cutting onions.


Third, mix onions, green onions, 1 1/2 eggs (1 egg and egg white of second egg), salt, and pepper into hamburger.  Use fork to mix together the ingredients.  *Tip: Don't mash hamburger.  Otherwise, the hamburger will become mushy.


Third, heat a pan over medium heat and oil with approximately 5 tbsp of oil (in this case, we used canola oil).  


Now, you want to cover the top of a large plate and the bottom of a small plate with wax paper.  Grab a ball of hamburger, place on top of large plate, and press the small plate against the ball until patty is formed.  Round the edges and place in pan.


Cook one side of the patty for 7-8 minutes.  Flip over and cook on other side for approximately 5 minutes (or until brown).  *Tip: Don't push down on patties.  


For the gravy:
Put small pan over low heat and pour can of gravy into pan.  Let slowly heat up.  Cook until it darkens and lightly bubbles.


Pour gravy over hamburger steak.  When serving, leave heat for both gravy and hamburger on low.  


I decided to start my project with hamburger steak because it is a fairly simple and basic recipe that requires basic techniques.  Even though this recipe was easy to follow (especially with the great help from dad), I still learned a good deal of things. 
1) I should probably resort to chewing gum when cutting up onions.  While chopping up the onions, I felt the stinging in my eyes that didn't go away until I finished cutting everything.  

2) I learned how to cut an onion.  I know, it sounds silly and simple, considering the only thing it requires is common sense.  

3) While making hamburger steak, my dad told me not to mash the hamburger or else it will make it mushy.

4) Forming hamburger patties by hand lessens the overall quality of the finished product.  Apparently, the heat from your hands can make the meat mushier, therefore making the patty mushier (eww).  

5) 1 lb of hamburger makes approximately 7 medium sized patties.  
    3/4 lb of hamburger makes approximately 5-6 medium sized patties.

6)  Don't push down the patties with the spatula when cooking in pan (a flat hamburger patty isn't as delicious as a thick and juicy hamburger patty).  

So far, I really like my quality project.  First of all, I enjoy going on a mini scavenger hunt for all the needed ingredients.  Second of all, it's fun to look up recipes (which I spent most of my time doing even before the project idea arose).  Third, I love learning new things.  Learning how to cook, especially from my parents.  Cooking with my dad today helped me realize what great parents I have.  Some families often resort to take-out food such as pizza, frozen foods, or fast foods for dinner.  Cooking tonight made me realize how often my family cooks home-made dinners (which are very delicious).
Another thing I realized tonight is fortunate I am to have both parents that have adequate cooking skills.  By cooking with them, they can pass all of their knowledge onto me.

Cooking your own food allows people to bond with my family.  Something I've always wanted in this household is for cooking to become a family activity, in which each of us performs one part.  For example, I could chop the vegetables, mom could saute the vegetables, and dad could cook the meat (and keep switching for each meal).  Cooking requires effect, and if a family does it together, it is more likely to be successful.  By putting in a group effort to whip up a good meal, cooking can allow families to bond.

Farmer's Market + Grocery Shopping

Today, my parents and I went grocery shopping for a few hours (and by a few hours I mean 4-5 hours).  First, we made our way to the the Manoa Farmer's Market.  There, we bought a green bell pepper (for the chicken linguine), basil (for the chicken pitas), a zucchini squash (for the chicken linguine), and more  produce (for my parents).  Going to the farmer's market isn't usually included in my family's weekly schedule, so this experience was somewhat interesting to me.
Shopping at the farmer's market has many benefits.  Some of the benefits include boosting economical conditions, energy conservation, environmental protection, and another step towards regional food self reliance.  By eating locally, you help the local economy by keeping the money within the community.  When buying from supermarkets such as Times, Safeway, Foodland, etc, a fraction of the money you spend on different products goes towards the foreign food supplier.  By buying from farmer's markets, you contribute to the health of the local economy, thus increasing the local quality of life.  By picking up a few groceries from the farmer's market, you are conserving energy.  By eating locally grown foods, you are helping to decrease on non - renewable energy sources like petroleum.  In the United States, one fifth of all the petroleum is used in Agriculture.  Organic production systems, such as the ones used by local farmers, do not rely on petroleum derived fertilizers and pesticides.  Because of this, farmers save energy on the farm.  Buying products from local farmers conserves additional energy at distribution levels.  Another benefit of buying from local producers is increased environmental protection.  A majority of farming methods used today include, soil erosion, pesticide contamination of soil, air, and water, and nitrate loading of waterways and wells.  Local producers practice methods that protect our natural resources (soil, air, and water resources).  Buying local produce helps the community take another step toward regional food self reliance.  In other words, by buying from local vendors, we are becoming more self sufficient.  Consistent dependency on foreign food sources leaves the community very vulnerable to food shortages and possible supply disruptions.  By buying foreign products, we are also promoting farms that hurt both the environment and the local economy.  Instead of relying on foreign food producers, we should shift our dependence to regional food production systems, which provides job and self-employment opportunities and enables people to influence how their food is grown.


The second part of my day consisted of shopping for the large remainder of my grocery list.  My parents and I ended visited Walmart, Times, Sams Club, and a few other places that names have escaped me. Even though it may be the most essential and basic step to cooking, shopping for ingredients has already taught me a few lessons.  One thing that I have learned today is that some recipes call for ingredients you may have not even heard of before (or never even knew existed for that matter).  For example, one of the ingredients included in the Chicken Pitas w/ Sun - Dried Tomato Vinaigrette recipe is "Chopped Drained Oil-Packed Sun-Dried Tomatoes".  Upon reading this, my parents and I looked around in confusion.  Chopped Drained Oil-Packed what?  After looking for this ingredient in a few stores, we gave up and decided to not include it in our recipe.  Another thing I learned is when shopping for ingredients, you may not find everything you need.  Instead, you could just learn to substitute exotic and unusual ingredients for more common and known products.  For example, I decided to substitute parmesan cheese for the Asiago cheese (needed in the Chicken Pitas) and the romano cheese (needed in the Chicken Linguine).  Another ingredient I will be substituting is the garlic flavored extra virgin olive oil needed in the Chicken Linguine.  Instead of buying a $12 bottle of oil that we will never use again, my parents and I decided to improvise by using extra virgin olive oil and garlic shreds.  


Upon visiting Times Supermarket today, my dad taught me a few things about buying meat and chicken.    First of all, the best meat you can get is 90/10, which means that there is 10% fat.  The next best one is 80/20, which means that theres is 20% fat (and so on).  The more fat you have, the cheaper the meat is.  The less fat you have, the more the meat cost.  To make the hamburger steak, my dad usually buys the Ground Sirloin 90/10 meat.  He says that even though it's more expensive, it's worth it.  


Another thing that I had to keep in mind today is how much chicken to buy for the chicken linguine.  The recipe calls for 1 lb fresh chicken.  To tell you the truth, I didn't know what to expect when it said to buy a pound of chicken.  I was thinking of fried chicken, not raw chicken (this comes to show how unexperienced I am when it comes to cooking).  In order to have an overall total of 1 lb of chicken, I had to do a little searching along with math.  I had to look through the different chickens and add up each of their net weights.  Finally, I ended up with chicken slices 0.47 lb and .60 lb, which totals up to 1.07 lbs of chicken.  Close enough!


At the end of the day, I helped my mom put away all of the groceries.  I have never seen the refrigerator stocked with a wide variety of different vegetables, fruits, and ingredients.  It was a nice change. :D


Sunday, May 1, 2011

French Toast

I don't think this counts as a meal, but I've always wanted to make French Toast!

Ingredients:
1/4 cup all-purpose flour
1 cup milk
1 pinch salt
3 eggs
1/2 tsp ground cinnamon
1 tsp vanilla extract
1 tbsp white sugar
12 thick slices bread


The first step is to measure the flour into a large mixing bowl.  Slowly whisk in the milk.  Whisk in teh salt, eggs, cinnamon, vanilla extract, and sugar until smooth.


After, heat a lightly oiled griddle or frying pan over medium heat.
Soak the bread slices in mixture until saturated.  


Cook bread on each side until golden brown.  Serve hot.


Nutritional Information:
Amount Per Serving  Calories: 123 | Total Fat: 2.7g | Cholesterol: 55mg


Since I usually eat peanut butter toast and multigrain cheerios for breakfast, french toast was a nice change.  I thought the recipe for the french toast I made was pretty good (not like I had any other recipes to compare it too).  The french toast didn't seem soggy, and the taste of it resembled cinnamon bread (which I have a strong liking for).

If I do make french toast in the near future (which is very likely), I would try to somehow enhance the flavor of the cinnamon.  To achieve this, I will try to saturate the bread, sprinkle the cinnamon, and then put it on the frying pan (cinnamon side down).  After the first side is thoroughly cooked, I could sprinkle and cook the other side.
Another suggestion I would make is to sprinkle powdered sugar on it or top the french toast off with something fancy ... like bananas or strawberries.  I don't know.  Maybe the fruit wouldn't work really good, but it seems like they would from looking at this of another attempt at making french toast.